Introduction: Why Soil Preparation is Key to a Thriving Garden
Creating a lush, vibrant garden starts with healthy soil. If you’re wondering how to prepare soil for gardening, you’re in the right place. Soil preparation is one of the most crucial aspects of gardening because it directly affects the growth and health of your plants. Whether you’re growing flowers, vegetables, or shrubs, the condition of your soil can make or break your garden. A nutrient-rich, well-drained, and properly pH-balanced soil will provide a thriving environment for your plants, helping them to flourish.
In this article, we will guide you through the process of preparing soil for gardening, from understanding different soil types to applying fertilizers and amendments. By the end of this guide, you’ll have all the knowledge you need to set up your garden for success.
Understanding Soil Types: The Foundation of Gardening Success
Before you start digging and adding fertilizers, it’s important to understand the different types of soil and how each one impacts plant growth. The primary soil types include:
Sandy Soil: Light, well-draining soil that tends to dry out quickly. It’s easy to work with but doesn’t retain nutrients well, requiring frequent fertilization.
Clay Soil: Heavy, dense soil that retains moisture but can become compacted and drain poorly. It can be rich in nutrients but often needs amendments to improve aeration.
Loamy Soil: Often considered the ideal soil for gardening, loam is a balanced mixture of sand, silt, and clay. It drains well, holds moisture effectively, and supports healthy plant roots.
Silty Soil: Smooth and rich in nutrients but can also be prone to compaction. Silty soil requires good drainage systems to avoid waterlogging.
To prepare soil for gardening effectively, knowing your soil type is essential. Conducting a soil test will help you determine its texture, pH, and nutrient levels, allowing you to make informed decisions on amendments and fertilizers.
How to Prepare Soil for Gardening: Step-by-Step Guide
1. Test Your Soil
Before jumping into soil preparation, the first thing you should do is test your soil. A soil test will provide valuable information about its pH, nutrient levels, and overall composition. Most garden centers or agricultural extension offices offer soil testing services. Alternatively, you can purchase DIY soil testing kits.
Soil tests usually measure the following:
pH level: The acidity or alkalinity of your soil, which affects nutrient availability. Most plants thrive in neutral to slightly acidic soil (pH 6-7).
Nutrient levels: Key nutrients like nitrogen (N), phosphorus (P), and potassium (K), which are essential for plant growth.
Organic matter content: Healthy soil should contain about 3-5% organic matter to ensure good structure and fertility.
Once you have the results, you can take appropriate action to adjust your soil accordingly.
2. Clear the Area and Remove Debris
The next step in preparing soil for gardening is to clear the area of any debris, such as rocks, weeds, and dead plants. Weeds compete with your garden plants for nutrients and water, so it’s important to remove them before planting.
To effectively remove weeds, consider using a hoe, rake, or even your hands for small patches. For larger areas, you might want to use an herbicide or an organic weed control method. Be sure to dispose of any weeds properly to prevent them from re-seeding in your garden.
3. Loosen the Soil
Once the area is cleared, it’s time to loosen the soil. Soil that is compacted can restrict root growth, water infiltration, and air circulation. Loosening the soil helps to create space for roots to grow deeper and allows for better drainage.
Use a shovel, garden fork, or a tiller to break up the soil. For smaller garden beds, hand tools will suffice, while larger areas may benefit from a motorized tiller. Aim to loosen the soil to a depth of 4-6 inches, or deeper if you’re planting larger plants with extensive root systems.

4. Add Organic Matter
Now comes one of the most important steps: adding organic matter. Organic materials like compost, well-rotted manure, or leaf mold enrich the soil, improving its texture, water retention, and nutrient content. Organic matter also promotes beneficial microbial activity, which is essential for plant health.
Spread a 2-4 inch layer of organic matter over the soil and work it in using a rake or shovel. If you’re using compost, be sure it is well-aged to avoid burning plants with excess nitrogen. Organic matter also helps to balance soil pH, making it easier for plants to access essential nutrients.
5. Amend the Soil Based on Test Results
Based on the results of your soil test, you may need to amend the soil further to adjust the pH or nutrient levels. For example:
To raise soil pH (make it more alkaline): Add lime (dolomitic or agricultural lime). To lower soil pH (make it more acidic): Add sulfur, peat moss, or pine needles. To improve nutrient levels: Add fertilizers or specific minerals, such as bone meal for phosphorus or blood meal for nitrogen.
Be sure to follow the recommendations from your soil test and avoid over-amending, as this can lead to imbalances that may harm your plants.
6. Incorporate Fertilizers
Fertilizers provide essential nutrients that might be lacking in the soil. There are two main types of fertilizers:
Organic fertilizers: Made from natural materials, such as compost, manure, or fish emulsion. They release nutrients slowly and improve soil health over time.
Synthetic fertilizers: Chemically formulated to provide specific nutrients quickly. These are often fast-acting but do not improve soil structure.
For best results, choose a fertilizer that suits the needs of your plants. For example, leafy vegetables might need more nitrogen, while flowering plants and fruiting vegetables may require higher levels of phosphorus and potassium.
7. Mix the Amendments and Fertilizers into the Soil
Once you’ve chosen your amendments and fertilizers, mix them thoroughly into the soil. Use a shovel, rake, or garden fork to ensure even distribution. Be sure to work the fertilizers to the depth at which your plants will be rooting. Mixing them evenly ensures that the nutrients are available to the plants from the very start.
8. Level the Soil
After preparing the soil, level it out using a rake. This helps to create an even planting surface and ensures that water will be distributed evenly. A level garden bed also reduces the risk of water pooling in low spots, which can cause root rot and other issues.
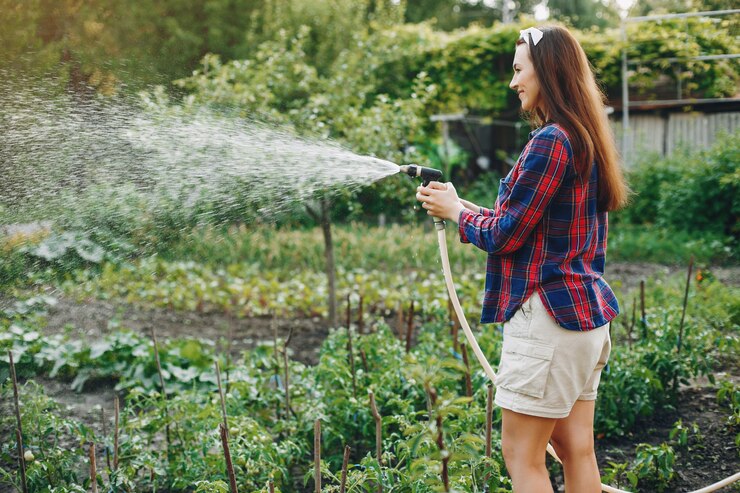
9. Water the Soil
Finally, water the soil thoroughly after preparing it. Watering helps to settle the soil and ensures that the amendments are integrated into the soil profile. It also helps to activate microbial life, which is essential for breaking down organic matter and making nutrients available to plants.
Maintaining Soil Health Throughout the Growing Season
Once your soil is prepared and your garden is planted, it’s important to maintain its health throughout the growing season. Here are some tips:
Mulch: Apply a layer of mulch around your plants to conserve moisture, suppress weeds, and improve soil structure over time.
Regular Fertilization: Depending on your soil type and the needs of your plants, consider applying additional fertilizer during the growing season.
Proper Irrigation: Avoid over-watering or under-watering, as both can stress your plants. Invest in a good irrigation system that provides consistent moisture.
Conclusion: Ready, Set, Grow!
Knowing how to prepare soil for gardening is the first and most important step toward a flourishing garden. By testing your soil, adding organic matter, adjusting pH, and incorporating the right fertilizers, you can create an environment where your plants can thrive. Whether you’re a beginner or an experienced gardener, taking the time to properly prepare your soil will pay off with a bountiful harvest or a beautiful garden.
With these tips and techniques, you’re well on your way to mastering soil preparation. Happy gardening!
By following these steps, you’ll ensure your garden has the best possible start. And with regular care and attention, you’ll enjoy a thriving, productive garden season after season.


